Though that helps you to see it in a ‘programmatic’ way, here’s a simple way (a layman approach) to find how many pixels your pic or blog or anything on your computer screen is.
We will use Microsoft Paint to get this done:
Go to run, type mspaintand hit enter.
Paint opens up with a blank white ‘paintable’ screen. Here, adjust the canvas inside Paint to your desired size using the placeholders given at its edges and corners.
Hit CTRL + E on your keyboard which brings up ‘Image Properties’ window.
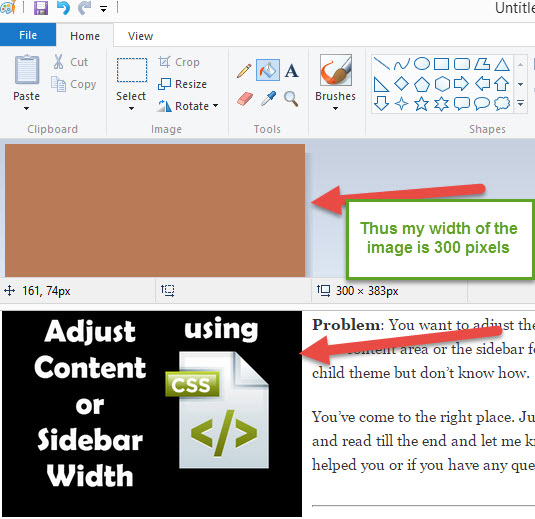
Under ‘units’ ensure ‘pixels’ is selected.
You’ll notice that the image’s width and height properties are shown in a numerical way.
That’s your width for the desired canvas or image or anything.
To compare this with any of your content on your blog, just place the paint canvas that we just measured on top of the content of your blog to see that content’s width: Here’s a screenshot example:
This is a layman approach to find any content’s width and since I am one, I often use this to find my content’s width. Sometimes, I do this with Chrome’s Inspect Element option too for not always one should remain a layman. 🙂 ((Just a lame try to be funny there!))
Please let me know your comments or if you have any questions or if you are just plain confused with the technique above. Happy to help!
Host images or any file on Dropbox and reduce your blog’s loading time
This process also saves you storage space on your precious hosting account, by hosting static files. But please remember that Dropbox cannot act as a CDN in the long run and you might inevitably find yourself looking for a regular CDN someday. Till then, and up to a point you want to scale up to that level, you may use Dropbox as the CDN.
Get your Dropbox from here – this special referral link gives additional FREE 500MB storage!
Once you signup for their affiliate program you get to earn up to a maximum of $97 per sale. Along with you also get to earn sub-referral commissions when your referrals refer someone else. This is called Tier-2 commission.
However, all these things are good. But as with all rules in blogging, adding images to spread your word about your own promo codes is the key to add a little spice to your message.
If you want to use images and affiliate banners to design your announcement and promo codes, DreamHost offers their own images and affiliate banners in a zipped format which you can see after logging in to their cpanel. But what if you don’t find good variety of affiliate banners there, and what if you wanted to create your own by adding your blog logo?
That’s when I use Canva! Like the one I used above blog post title header for this post.
Canva comes to my rescue whenever I have design needs. Canva helps me to create a banner for almost every kind of need: Presentation, Twitter header, add logos, PNG images, Instagram posts, other posters.
They have also recently added (March, 2015) Blog Title category with which you can create beautiful blog title designs.
There is also this new Ads category with which you can create Facebook ads, Leaderboard ads, Skyscraper ads, Medium rectangle ads, etc.
Actually, you can use Canva for creating any design for any platform, not just DreamHost affiliate banners. Let me know your thoughts, comments – if you know of any other valuable, almost-free-kinda-resource like Canva.