Follow these steps to adjust your Blogger theme width:
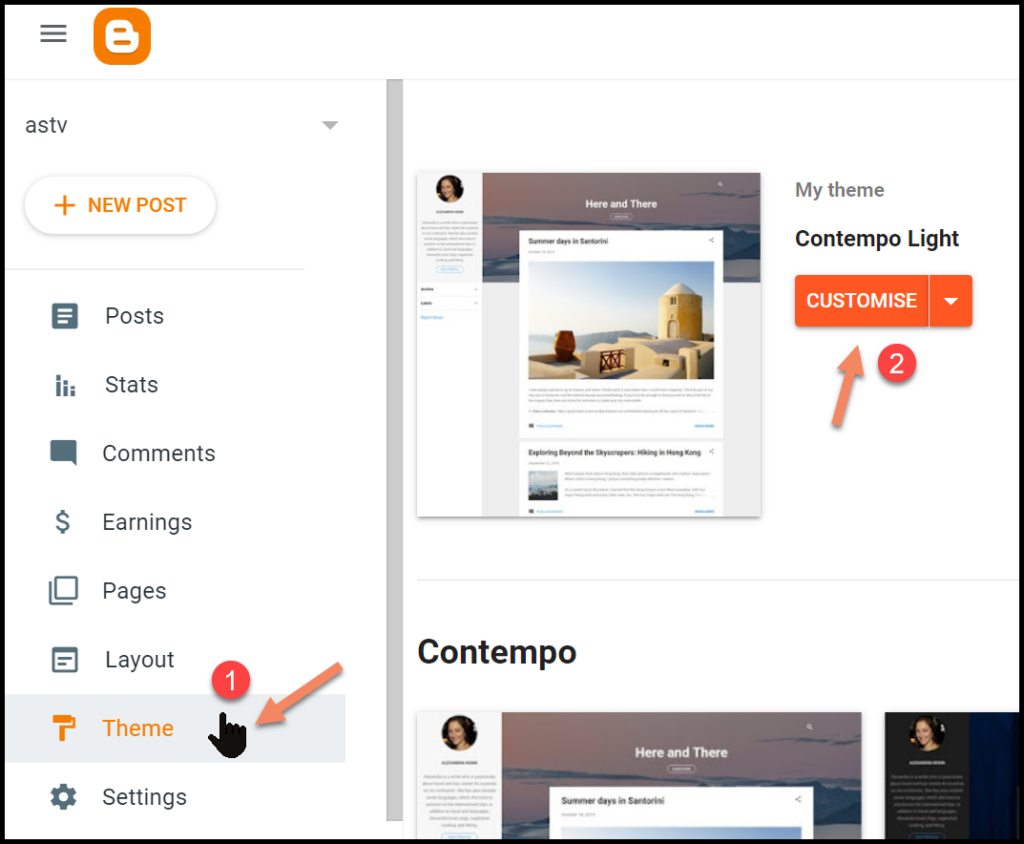
- Log in to your Blogger account dashboard and navigate to the “Theme” section.
- In the Theme section, click on the “Customize” button for your chosen theme.

- In the left sidebar, click on the “Advanced” drop-down; then within that click on the drop-down to find the “width” option. This option may vary depending on your theme.

- You’ll typically find options to adjust the widths of the sidebar, content, and content margin.
- Use the provided sliders, input fields, or drag handles to adjust the width according to your preference. If you know the specific pixel count you want, you can also precisely adjust your Blogger Theme width that way.

- As you make adjustments, you may see a live preview of the changes on the right-hand side of the screen. Again, this might depend and vary on your theme.

- Once you are satisfied with the width adjustments, click the “Save” button to save the changes, as shown in the screenshot above.
The available customization options and their exact location may vary depending on the specific Blogger theme you are using.
If you don’t find the desired width adjustment options, you may need to explore alternative themes or consider using custom CSS to modify the width further.
On a separate note, if you are wondering how to disable right-clicking options in your Blogger blog, I have written a detailed blog post here to solve that for you.
Hope this helps you to quickly customize and adjust the Blogger theme width.
